分类目录归档:QQuick

QML 本地存储

QML 原生的储存方有两种:

1,Settings

跟QWidget 中的QSettings 一样,可以简单的存储一些配置。

2,SQLite

sqlite数据库。可以存储一些复杂的数据。

一,Settings

我们以一个按钮的位置为例,进行讲解。

按钮移动时将x y 保存到Settings 中。

下次加载页面时 从Settings 读取位置。

import QtQuick 2.15
import QtQuick.Window 2.15
import QtQuick.Controls 2.15
import Qt.labs.settings 1.0

Window {
    width: 640
    height: 480
    visible: true
    title: qsTr("Hello World")

    Settings {
        id: settings
        property int x: 0
        property int y: 0
    }

    Button{
        id:btn
        text: "hello"
        x:settings.x
        y:settings.y
    }

    Button{
        anchors.centerIn: parent
        text: "move"
        onClicked: {
            btn.x+=10
            btn.y+=10

            settings.x = btn.x
            settings.y = btn.y
        }
    }
}

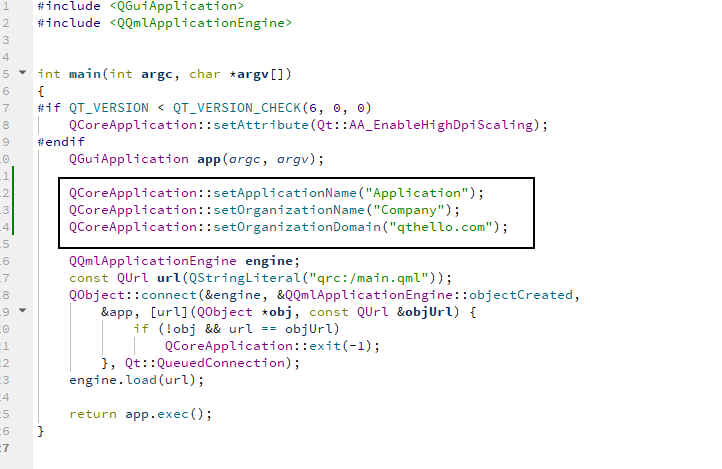
main.cpp 中需要 定义 应用程序名称,公司名称,域名称。
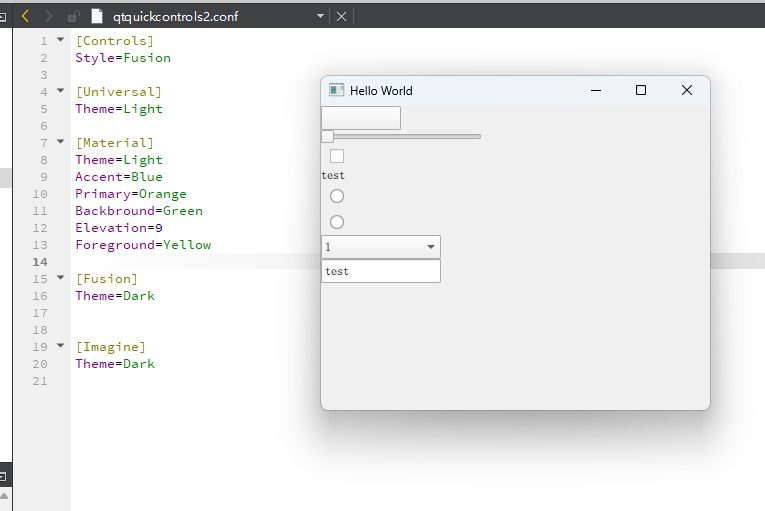
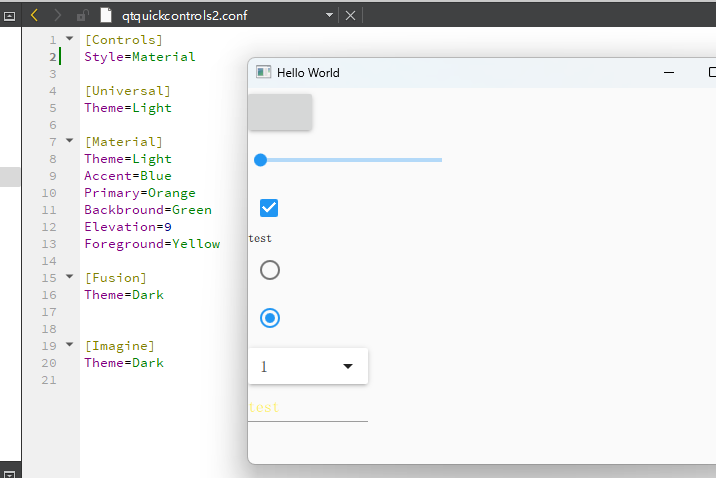
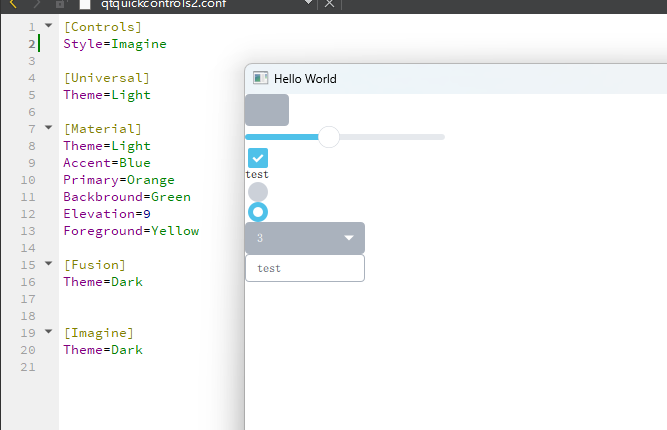
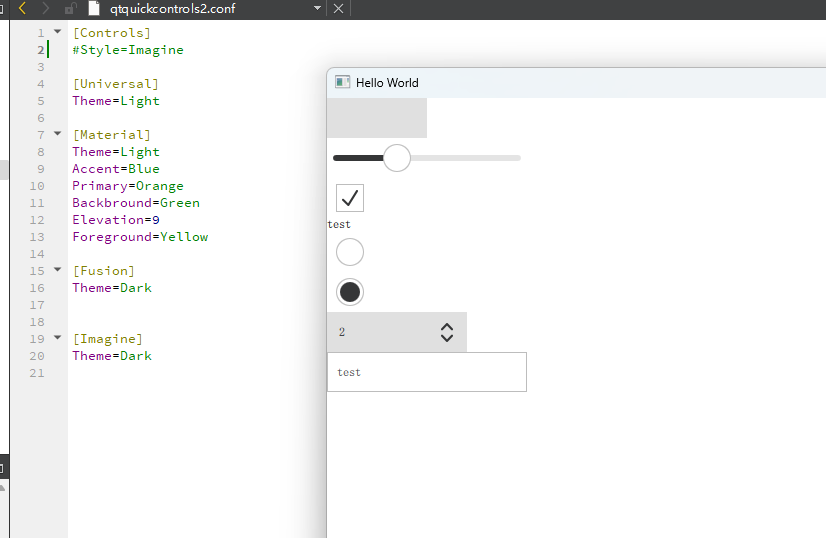
效果:

二,SQLite

1,将数据库操作 单独封装成一个js文件。

var db;

function initDatabase() {
    db = LocalStorage.openDatabaseSync("Test", "1.0", "", 100000);
    try {
        db.transaction( function(tx) {
            tx.executeSql('CREATE TABLE IF NOT EXISTS data(name TEXT, desc TEXT, value TEXT)');
        })
    } catch (err) {
           console.log("Error creating table in database: " + err)
       };
}

function readData(name) {
    var res="";
    if(!db) { return; }
    db.transaction( function(tx) {
        var result = tx.executeSql('select value from data where name=?', [name]);
        if (result.rows.length > 0) {
             res = result.rows.item(0).value;
        } else {
            res = "Unknown";
        }
    })
    return res
}

function insertData(name, desc,value) {
    var res = "";
    if(!db) { return; }
    db.transaction( function(tx) {
        var result = tx.executeSql('INSERT OR REPLACE INTO data VALUES (?,?,?);', [name,desc, value]);
        if (result.rowsAffected > 0) {
          res = "OK";
        } else {
          res = "Error";
        }
    })
    return res
}

2,使用的时候 引入js 文件,之后直接调用接口就可以了。

import QtQuick 2.15
import QtQuick.Window 2.15
import QtQuick.Controls 2.15

import QtQuick.LocalStorage 2.0
import "db.js" as DB

Window {
    width: 640
    height: 480
    visible: true
    title: qsTr("Hello World")

    Component.onCompleted: {
        //初始化数据库
        DB.initDatabase()
    }

    Column{
        anchors.centerIn: parent
        spacing: 10
        Row{
            spacing: 10
            Button{
                text: "添加"
                onClicked: {
                    //添加数据
                    DB.insertData(name.text,desc.text,value.text)
                }
            }
            TextField{
                id:name
            }

            TextField{
                id:desc
            }

            TextField{
                id:value
            }

        }
        Row{
            spacing: 10
            Button{
                text: "查询"
                onClicked: {
                    //查询数据
                    result.append(DB.readData(queryName.text))
                }
            }

            TextField{
                id:queryName
            }

            TextEdit{
                id:result
            }
        }
    }
}

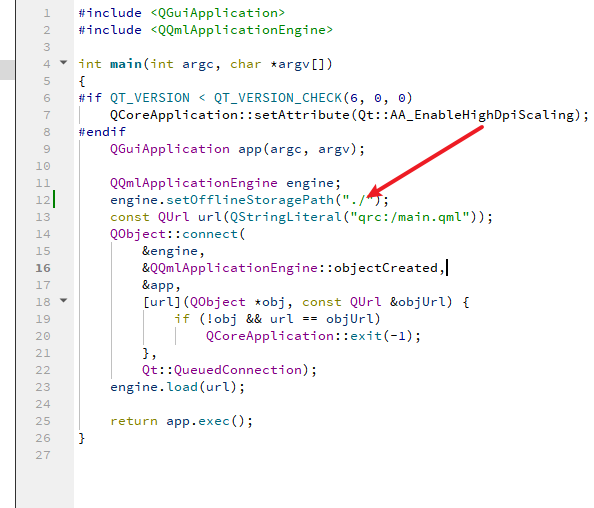
3,main.cpp 中 指定下数据库的保存路径,比如当前路径。 不指定的话,会默认存到系统路径,不太好找。

4,效果

QML model-view 框架

在开发用户界面时,最好的办法是保持数据与可视化的分离。比如一个通讯录,可以用list展示,也可以用grid展示,这都属于view部分,可以不同。但是数据都是相同的,都有名称,头像,手机号等元素。QML针对这种场景提供了model-view框架。其实同样的模式在传统的QWidget 框架中也有,比如QListView 和QTableView。

一,实现起来,记住三个关键点:

1,model。 数据来源,一般是通过网络请求获取。

2,view。负责可视化显示,是ListView 还是GridView。

3,delegate。代理,就是怎么展示数据。它负责将model和view连接起来,将model中的每条数据通过具体的控件,渲染到view中。

下面通过一个例子,来说明代码的写法,这个例子类似一个通讯录,数据我们写死,真实情况应该是从接口获取。利用ListView进行可视化。代理是一个Rectangle 内部一个Image展示头像,一个Text 显示文本。

import QtQuick 2.15
import QtQuick.Window 2.15
import QtQuick.Layouts 1.15

Window {
width: 640
height: 480
visible: true
title: qsTr("Hello World")

//可视化view
ListView{
anchors.fill: parent
width: 100
delegate: addressDelegate
model: model
}

//list 模型
ListModel{
id:model
}

//代理
Component{
id:addressDelegate
Rectangle{
width: 140
height: 120

RowLayout{
anchors.fill: parent
anchors.margins: 10
//头像
Image {
source: img
Layout.preferredWidth: 100
Layout.preferredHeight: 100
}
//名称
Text {
text: name
verticalAlignment: Text.AlignVCenter
}
}
}
}

//构造模型数据
Component.onCompleted: {
model.append({"img":"https://img2.baidu.com/it/u=607192830,2624468444&fm=253&fmt=auto&app=120&f=JPEG?w=1025&h=684","name":"刘备"})
model.append({"img":"https://img2.baidu.com/it/u=1662844506,2024543724&fm=253&fmt=auto&app=120&f=JPEG?w=800&h=1052","name":"关羽"})
model.append({"img":"https://img2.baidu.com/it/u=2512544330,2343544095&fm=253&fmt=auto&app=138&f=JPEG?w=400&h=300","name":"张飞"})
model.append({"img":"https://img2.baidu.com/it/u=4186203074,1390758742&fm=253&fmt=auto&app=138&f=JPEG?w=500&h=618","name":"赵云"})
}
}

二,总结

这套模型还有很多用法,比如数据量特别大的时候,可以使用Flickable元素,同时可以限制代理数量。还可以动态的增加,删除模型。添加页眉页脚等。但是底层逻辑还是那三条,model 负责加载数据,view 负责显示,delegate负责具体每条数据如何展示。

QML中调用HTTP请求

涉及到Http请求,第一反应可能是使用Qt的QNetworkRequest和QNetworkReply实现,然后QML再与其交互,但是这样过于麻烦了。其实QML自己已经具备了http网络请求访问的功能。而且使用起来很方便。

我们这里举一个访问天气接口,然后解析其数据的例子。

一,看下效果

二,代码

主要是利用XMLHttpRequest这个类,请求接口,然后将返回的数据解析成json对象(JSON.parse),之后就可以像js一样去拿json对象里的数据了,当然前提是接口返回得数据是json。

import QtQuick 2.15
import QtQuick.Window 2.15
import QtQuick.Controls 2.15

Window {
width: 640
height: 480
visible: true
title: qsTr("Hello World")

//主要看这个函数
function request() {
var xhr = new XMLHttpRequest();
xhr.onreadystatechange = function() {
if (xhr.readyState === XMLHttpRequest.HEADERS_RECEIVED) {
console.log('HEADERS_RECEIVED')
} else if(xhr.readyState === XMLHttpRequest.DONE) {
console.log('DONE')
console.log(xhr.responseText.toString())
var object = JSON.parse(xhr.responseText.toString());

text.append(object["errcode"])
text.append(object["errmsg"])
}
}
xhr.open("GET", "http://v0.yiketianqi.com/free/v2030?city=&cityid=&adcode=130200000000&appid=&appsecret=&lng=&lat=&aqi=&hours=");
xhr.send();
}

Button{
anchors.centerIn: parent
onClicked: {
request()
}
}

TextEdit {
id: text
height: 200
width: 300
anchors.bottom: parent.bottom
anchors.horizontalCenter: parent.horizontalCenter
}
}

QML 中的状态

状态描述了当前用户界面样子,QML中一个状态定义了一组属性的改变,并且会在一定条件下被触发。

假设有这么一个场景,红黄绿三个灯,用一个按钮,点击后依次切换三个灯亮起。使用QWidget的思路去实现就是在按钮click对应的槽函数中,依次获取三个button的指针,然后改变其颜色,这样也能实现,但是不够优雅。QML的思路是,全局定义一组状态,然后每个状态来控制具体的属性,使用时只要切换不同状态就可以了,后续修改的话,只需要修改这个全局状态就行,并且三个按钮集中暴露在这组状态中。

一,定义三个灯

//三个灯的按钮
Row{
anchors.centerIn: parent
spacing: 20
//红灯
Rectangle{
id:red
width: 50
height: 50
radius: 50
color: "red"
}

//黄灯
Rectangle{
id:yellow
width: 50
height: 50
radius: 50
color: "yellow"
}

//绿灯
Rectangle{
id:green
width: 50
height: 50
radius: 50
color: "green"
}
}

二,定义一组状态,每个状态控制 三个灯具体的属性

//定义一组状态 规定每个状态下 的属性
Item{
id:root
state:"red"
states: [
State {
//红灯状态 红灯亮 其它灭
name: "red"
PropertyChanges {target: red;color:"red"}
PropertyChanges {target: yellow;color:"gray"}
PropertyChanges {target: green;color:"gray"}
},
State {
name: "yellow"
PropertyChanges {target: yellow;color:"yellow"}
PropertyChanges {target: red;color:"gray"}
PropertyChanges {target: green;color:"gray"}
},
State {
name: "green"
PropertyChanges {target: green;color:"green"}
PropertyChanges {target: red;color:"gray"}
PropertyChanges {target: yellow;color:"gray"}
}
]
}

三,切换时 只需要指定 当前状态是 谁即可。

//依次切换三个状态
Button{
anchors.bottom: parent.bottom
anchors.horizontalCenter: parent.horizontalCenter
text: qsTr("切换")
onClicked: {
if(root.state=="red")
root.state="yellow"
else if(root.state=="yellow")
root.state="green"
else
root.state="red"
}
}

四,效果

五,过渡

我们还可以在状态切换的时候,加上过渡的动画,让其看起来更丝滑。过渡规定了从状态A到状态B切换时,某个动画的变化。比如下边状态红灯 到黄灯时,红灯和黄灯颜色持续500毫秒。

六,代码

https://gitcode.com/keiler20181/QMLState.git

QML 不同风格和主题的切换

Quick程序提供了方便的用于切换不同风格和主题的配置文件,如果没有设计稿,又想界面没那么丑,那么可以用这套配置,让应用看起来相对专业一点。

一,在 qrc 资源文件中添加 qtquickcontrols2.conf 文件。

二,编辑这个文件。

qt 共提供5种不同的风格。

1,Default Style:
默认风格,其外观和行为会随着操作系统和系统主题的变化而变化。它保持了跨平台的一致性,并且对大多数常见控件提供了自然的外观。

2,Material Style:
受 Google Material Design 影响的风格,主要用于移动应用程序。它强调了阴影、动画和响应式布局,具有现代感和生动感。

3,Universal Style:
致力于提供一种在不同操作系统上具有一致外观的风格。它适合那些希望应用程序在不同平台上保持相似外观的开发者。

4,Imagine Style:
一种受到 macOS 的设计风格启发的风格,它提供了类似 macOS 风格的外观和交互体验。

5,Fusion Style:
基于 Qt Widgets 的 Fusion 主题,提供了一种类似传统桌面应用程序的外观和行为。

每种风格还可以设置不同的属性。

1. accent,color类型,表示重点色,默认是Pink

2. primary,color类型,表示优选色,默认是Indigo

3. backbround,color类型,表示背景色,默认由主题指定(light或者dark)

4. elevation,int类型,表示海拔高度,值越大,阴影越深,该值与具体控件相关

5. foreground,color类型,表示前景色,默认值由主题指定(light或者dark)

6. theme,枚举类型,表示主题,默认是Light,也可修改为Dark

三,看下效果

1,fusion

2,Universal

3,Material

4,Imagine

5,默认风格

6,Dark主题

四,代码

https://gitcode.com/keiler20181/QMLStyle.git

QML 调用C++ 单列对象

一些对象是全局唯一的,特别适合使用单列模式,比如网络,数据库,或者跟设备相关的功能,如串口,plc等,因此在QML中访问C++的单列,就很有必要。

一,C++单例

以一个相机操作为例,这里只列出只要功能。

class ImageHandle : public QThread
{
Q_OBJECT

public:
//单例模式的声明
static ImageHandle* instance(){
static ImageHandle manager;
return &manager;
}

//给QML调用的接口
Q_INVOKABLE void startPreview();

private:
explicit ImageHandle(QObject *parent = nullptr);
~ImageHandle();

};

二,main.cpp 中注册单列,这样才能在QML中使用。

一共两步,一步定义一个函数(configureProvider),还有一步是利用qmlRegisterSingletonType注册

#include <QGuiApplication>
#include <QQmlApplicationEngine>
#include <QIcon>
#include "comm/imageHandle.h"

//单例的使用
static QObject *configureProvider(QQmlEngine *engine, QJSEngine *scriptEngine)
{
Q_UNUSED(engine)
Q_UNUSED(scriptEngine)
return ImageHandle::instance();
}

int main(int argc, char *argv[])
{
QGuiApplication::setAttribute(Qt::AA_UseHighDpiPixmaps);
QGuiApplication::setAttribute(Qt::AA_Use96Dpi);

QGuiApplication app(argc, argv);

//单例的使用
qmlRegisterSingletonType<ImageHandle>("ImageHandle",1,0,"ImageHandle",configureProvider);

QQmlApplicationEngine engine;
const QUrl url(QStringLiteral("qrc:/main.qml"));
QObject::connect(&engine, &QQmlApplicationEngine::objectCreated,
&app, [url](QObject *obj, const QUrl &objUrl) {
if (!obj && url == objUrl)
QCoreApplication::exit(-1);
}, Qt::QueuedConnection);
engine.load(url);

return app.exec();
}

三,QML中使用

import 导入后 就可以直接使用了。

QML与C++交互

QML写界面,业务逻辑使用C++,既能快速的开发界面也能利用C++的强大生态,这是目前比较被认可的方式,那就涉及到QML与C++对象的交互。

我们以登录例子来说明,页面点击登录,将信息传递到c++ http对象进行密码的验证,然后返回登录结果。

一,调用C++中的函数

1,普通C++类

#ifndef HTTPHANDLER_H
#define HTTPHANDLER_H

#include <QObject>
class HTTPHandler:public QObject{
Q_OBJECT
public:
HTTPHandler(QObject* parent=0):QObject(parent){

}
//登录接口 验证用户名 和密码
Q_INVOKABLE bool login(QString name,QString pwd){
if(name=="admin"&&pwd=="123"){
return true;
}else{
return false;
}
}
};
#endif // HTTPHANDLER_H

2,注册C++ 类

main.cpp注册此 C++ 类型,这样QML中就能使用了。

#include <QGuiApplication>
#include <QQmlApplicationEngine>
#include "HTTPHandler.h"

int main(int argc, char *argv[])
{
#if QT_VERSION < QT_VERSION_CHECK(6, 0, 0)
QCoreApplication::setAttribute(Qt::AA_EnableHighDpiScaling);
#endif
QGuiApplication app(argc, argv);

//注册类型
qmlRegisterType<HTTPHandler>("HTTPHandler", 1, 0, "HTTPHandler");


QQmlApplicationEngine engine;
const QUrl url(QStringLiteral("qrc:/main.qml"));
QObject::connect(&engine, &QQmlApplicationEngine::objectCreated,
&app, [url](QObject *obj, const QUrl &objUrl) {
if (!obj && url == objUrl)
QCoreApplication::exit(-1);
}, Qt::QueuedConnection);
engine.load(url);

return app.exec();
}

3,调用C++对象中的函数

只要是C++中 通过Q_INVOKABLE关键词声明的public函数,QML中都能访问。


import QtQuick 2.15
import QtQuick.Controls 1.4
//导入C++ 对象
import HTTPHandler 1.0

Rectangle{
width: 200
height: 200

//相当于 实列化一个C++对象
HTTPHandler{
id:httpHandler
}

signal loginOk()
Row{
anchors.centerIn: parent
TextField{
id:name
}
TextField{
id:pwd
}
}
Button{
anchors.bottom: parent.bottom
text: qsTr("登录")
onClicked: {
//调用C++对象中的函数
if(httpHandler.login(name.text,pwd.text)){
loginOk()
}
}
}
}

二,响应C++中的信号

上述方式相当于同步的方式调用C++中的函数,还可以异步的响应C++中的信号,相当于QML中的槽与C++中的信号进行绑定。

1,C++类

#ifndef HTTPHANDLER_H
#define HTTPHANDLER_H

#include <QObject>
class HTTPHandler:public QObject{
Q_OBJECT
public:
HTTPHandler(QObject* parent=0):QObject(parent){

}

Q_INVOKABLE void login(QString name,QString pwd){
if(name=="admin"&&pwd=="123"){
//验证成功后 激发信号
emit loginSuccess();
}
}

signals:
//登录成功信号
void loginSuccess();
};
#endif // HTTPHANDLER_H

2,响应C++信号

import QtQuick 2.15
import QtQuick.Controls 1.4
import HTTPHandler 1.0

Rectangle{
width: 200
height: 200

//相当于 实列化一个C++对象
HTTPHandler{
id:httpHandler
//绑定C++信号
onLoginSuccess: {
loginOk()
}
}

signal loginOk()
Row{
anchors.centerIn: parent
TextField{
id:name
}
TextField{
id:pwd
}
}
Button{
anchors.bottom: parent.bottom
text: qsTr("登录")
onClicked: {
//调用C++对象中的函数
httpHandler.login(name.text,pwd.text)

}
}
}

三,绑定C++中的属性

还可以直接在C++定义属性,然后QML绑定此属性,适合实时的传递一些状态数据。

1,C++类

#ifndef HTTPHANDLER_H
#define HTTPHANDLER_H

#include <QObject>
class HTTPHandler:public QObject{
Q_OBJECT
//注册属性
Q_PROPERTY(QString status READ getStatus WRITE setStatus NOTIFY statusChanged FINAL)

public:
HTTPHandler(QObject* parent=0):QObject(parent){

}

Q_INVOKABLE bool login(QString name,QString pwd){
if(name=="admin"&&pwd=="123"){
return true;
}else{
//设置状态信息
setStatus("pwd or name error");
}
}

QString getStatus() const;
void setStatus(const QString &newStatus);

signals:
void statusChanged();

private:
//状态信息
QString status;
};

inline QString HTTPHandler::getStatus() const
{
return status;
}

inline void HTTPHandler::setStatus(const QString &newStatus)
{
if (status == newStatus)
return;
status = newStatus;
emit statusChanged();
}


#endif // HTTPHANDLER_H

2,绑定属性

import QtQuick 2.15
import QtQuick.Controls 1.4
import HTTPHandler 1.0

Rectangle{
width: 200
height: 200

//相当于 实列化一个C++对象
HTTPHandler{
id:httpHandler
}

signal loginOk()
Row{
anchors.centerIn: parent
TextField{
id:name
}
TextField{
id:pwd
}
}

//定义一个文本框 直接绑定C++的属性
Text {
anchors.top: parent.top
text: httpHandler.status
}
Button{
anchors.bottom: parent.bottom
text: qsTr("登录")
onClicked: {
//调用C++对象中的函数
if(httpHandler.login(name.text,pwd.text)){
loginOk()
}
}
}
}

3,看下效果

点击登录 ,如果密码或用户名错误会将C++的状态信息,实时的显示到左上角的QML Text控件中。

QML中的页面切换方式

整理下QML中页面切换的两种方式,这里以常见的登录为例,分为两个页面。登录页和主页,软件起来首先呈现登录页,点击登录进入主页,点击退出 返回到登录页

一,隐藏的方式

1.效果

2.定义两个页面(登录页,和首页),并定义登录成功和返回信号。当点击登录时,激发登录成功信号,点击退出时 激发返回信号。

3.main.qml中对两个信号进行处理。分别隐藏和显示不同的页面。

二,动态加载的方式

用Loader占位,然后动态加载组件。类似先定义一个指针,然后根据需要指向不同的内存。

三,SwipeView方式

这种相当于把页面都放到了一个容器里,然后滑动切换。

四,总结

1与3类似。当页面构造时,如果需要同时开辟很大的内存,此时建议用1,3的方式,提前把内存开辟好,这样页面页会加载的快一些。

自定义Switch

一,需求
QML中实现自定义的Switch。
二,效果


三,实现

这个要用以前的版本。

import QtQuick.Controls 1.4 as PreControl
import QtQuick.Controls.Styles 1.4
PreControl.Switch{
id:lightSwidch
height: 26
anchors.verticalCenter: parent.verticalCenter
style: SwitchStyle {
groove: Rectangle {
width: 57
height: 26
radius: 13
color: lightSwidch.checked?"#3F64EB":"#414850"
}
handle: Rectangle{
width: 26
height: 26
radius: 13
color: "#FAFCFF"
}
}
onCheckedChanged: {

}
}

自定义 Slider

一,需求
QML中实现自定义的Slider。

二,效果

三,实现

import QtQuick 2.12
import QtQuick.Controls 2.15

Item {
id: root
property int startval: 0
property int endval: 100
property int sliderWidth: 200

implicitHeight: control.height + label.height
implicitWidth: sliderWidth

Rectangle {
color: Qt.rgba(0,0,0,0)
width: root.width
height: root.height
}
Slider {
id: control
stepSize: 1
anchors.centerIn: parent
snapMode: Slider.SnapOnRelease
width: root.sliderWidth
from: root.startval
to: root.endval
handle: Rectangle {
id: handleId
x: control.visualPosition * (control.width - width)
y: (control.height - height) / 2
width: 20
height: 20
radius: 20
color: "#FFFFFF"
}

// background: Rectangle {
// y: (control.height - height) / 2
// height: 4
// radius: 2
// color: "green"

// Rectangle {
// width: control.visualPosition * parent.width
// height: parent.height
// color: "red"
// radius: 2
// }
// }
}

Label {
id: label
width: 20
height: 20
text: control.value
font.pixelSize: 15
color: "#FFFFFF"
x: handleId.x + control.x
y: handleId.y - 10
Rectangle {
color: Qt.rgba(0,0,0,0)
anchors.fill: parent
opacity: 0.3
}
}
}

四,使用

QML实现 无边框 可移动 可缩放窗体

一,需求

利用QML实现无边框窗体,要求可移动,可缩放。

二,效果

三,实现

//主窗体
import QtQuick 2.12
import QtQuick.Controls 2.3
import QtQuick.Window 2.3

import "./widget"

Window {
id: window
visible: true
flags: Qt.FramelessWindowHint|Qt.Window
width: 1024
height: 768
color: "#0F1013"
property int bw: 3

//改变鼠标形状
MouseArea {
anchors.fill: parent
hoverEnabled: true
cursorShape: {
const p = Qt.point(mouseX, mouseY)
const b = bw + 10
if (p.x < b && p.y < b) return Qt.SizeFDiagCursor
if (p.x >= width - b && p.y >= height - b) return Qt.SizeFDiagCursor
if (p.x >= width - b && p.y < b) return Qt.SizeBDiagCursor
if (p.x < b && p.y >= height - b) return Qt.SizeBDiagCursor
if (p.x < b || p.x >= width - b) return Qt.SizeHorCursor
if (p.y < b || p.y >= height - b) return Qt.SizeVerCursor
}
acceptedButtons: Qt.NoButton
}

DragHandler {
id: resizeHandler
grabPermissions: TapHandler.TakeOverForbidden
target: null
onActiveChanged: if (active) {
const p = resizeHandler.centroid.position
const b = bw + 10
let e = 0;
if (p.x < b) { e |= Qt.LeftEdge }
if (p.x >= width - b) { e |= Qt.RightEdge }
if (p.y < b) { e |= Qt.TopEdge }
if (p.y >= height - b) { e |= Qt.BottomEdge }
window.startSystemResize(e);
}
}

MyToolBar{
window:window
}
}

//工具栏
import QtQuick 2.12
import QtQuick.Controls 2.3
import QtQuick.Window 2.3

ToolBar {
height: 50
anchors.top: parent.top
anchors.left: parent.left
anchors.right: parent.right
x:bw
y:bw

property var window: null
//关闭 最大化 最小化按钮
function toggleMaximized(mode) {
if(mode===0){
if (window.visibility === Window.Maximized) {
window.showNormal();
} else {
window.showMaximized();
}
}else if(mode===1){
window.showMinimized()
}else if(mode===2){
window.close()
}else if(mode===4){
return window.visibility
}

}

Rectangle{
id:rectBk
anchors.fill: parent
color: "#1F2025"
MouseArea {
anchors.fill: parent
acceptedButtons: Qt.LeftButton
property point clickPos: "0,0"
onPressed: {
clickPos = Qt.point(mouse.x, mouse.y)
}
onDoubleClicked: {
toggleMaximized(0)
}
onPositionChanged: {
//鼠标偏移量
var delta = Qt.point(mouse.x-clickPos.x, mouse.y-clickPos.y)

window.setX(window.x+delta.x)
window.setY(window.y+delta.y)
}
}
}

Row{
anchors.right: parent.right
anchors.top: parent.top
anchors.bottom: parent.bottom
spacing: 0
Rectangle{
width: 50
height: 50
color: Qt.rgba(0,0,0,0)
Image {
anchors.centerIn: parent
id: min
source: "qrc:/image/icon/minus.png"
width: 26
height: 26
}
MouseArea{
anchors.fill: parent
hoverEnabled: true
onClicked: {
toggleMaximized(1)
}
onEntered: {
parent.color = "#454B57"
}

onExited: {
parent.color = Qt.rgba(0,0,0,0)
}
}
}

Rectangle{
width: 50
height: 50
color: Qt.rgba(0,0,0,0)
Image {
id: max
source: (toggleMaximized(4) === Window.Maximized)?"qrc:/image/icon/maximize.png":"qrc:/image/icon/maximize2.png"
anchors.centerIn: parent
width: 26
height: 26
}
MouseArea{
anchors.fill: parent
hoverEnabled: true
onClicked: {
console.log("max")
toggleMaximized(0)
}
onEntered: {
parent.color = "#454B57"
}
onExited: {
parent.color = Qt.rgba(0,0,0,0)
}
}
}

Rectangle{
width: 50
height: 50
color: Qt.rgba(0,0,0,0)
Image {
id: close
source: "qrc:/image/icon/close.png"
anchors.centerIn: parent
width: 26
height: 26
}
MouseArea{
anchors.fill: parent
hoverEnabled: true
onClicked: {
toggleMaximized(2)
}
onEntered: {
parent.color = "#454B57"
}

onExited: {
parent.color = Qt.rgba(0,0,0,0)
}
}
}

}

//标题
Text {
id:title
anchors.left: parent.left
anchors.verticalCenter: parent.verticalCenter
anchors.leftMargin: 20
color: "#FFFFFF"
font.pixelSize: 24
text: qsTr("影像检测仪")
}

Menu {
id:settingMenu
x:setting.x
y:setting.y+setting.height+1
width: 120
Action {
text: qsTr("创建项目")
onTriggered: console.log("创建项目")

}
Action {
text: qsTr("编辑项目")
onTriggered: console.log("编辑项目")
}

delegate: MenuBarItem {
id: settingMenuItem
height: 40
width: 120

contentItem: Text {
text: settingMenuItem.text
font.pixelSize: 16
color: "#ffffff"
horizontalAlignment: Text.AlignHCenter
verticalAlignment: Text.AlignVCenter
elide: Text.ElideRight
}

background: Rectangle {
implicitWidth: 120
implicitHeight: 40
color: Qt.rgba(0,0,0,0)
MouseArea{
anchors.fill: parent
hoverEnabled: true
propagateComposedEvents: true
onClicked: {
settingMenu.close()
settingMenuItem.action.trigger()
}
onEntered: {
parent.color = "#454B57"
}

onExited: {
parent.color = Qt.rgba(0,0,0,0)
}
}
}
}
background: Rectangle {
implicitWidth: 150
implicitHeight: 40
color: "#1F2025"
}
}

//设置
Rectangle{
id:setting
anchors.top: parent.top
anchors.bottom: parent.bottom
anchors.left:title.right
anchors.leftMargin: 100
color: Qt.rgba(0,0,0,0)
width: 100

Row{
anchors.centerIn: parent
spacing: 2
Text {
color: "#FFFFFF"
font.pixelSize: 20
text: qsTr("设置")
verticalAlignment: Text.AlignVCenter
anchors.verticalCenter: parent.verticalCenter
}
Image {
width: 32
height: 32
anchors.verticalCenter: parent.verticalCenter
source: "qrc:/image/icon/down.png"
}
}
MouseArea{
anchors.fill: parent
hoverEnabled: true
propagateComposedEvents: true
onClicked: {
settingMenu.open()
}
onEntered: {
parent.color = "#454B57"
}

onExited: {
parent.color = Qt.rgba(0,0,0,0)
}
}

}

//关于菜单
Menu {
id:aboutMenu
x:about.x
y:about.y+about.height+1
width: 120
Action {
text: qsTr("关于这个")
onTriggered: console.log("关于这个")
}
Action {
text: qsTr("关于那个")
onTriggered: console.log("关于那个")
}

delegate: MenuBarItem {
id: aboutMenuItem
height: 40
width: 120

contentItem: Text {
text: aboutMenuItem.text
font.pixelSize: 16
color: "#ffffff"
horizontalAlignment: Text.AlignHCenter
verticalAlignment: Text.AlignVCenter
elide: Text.ElideRight
}

background: Rectangle {
implicitWidth: 120
implicitHeight: 40
color: Qt.rgba(0,0,0,0)
MouseArea{
anchors.fill: parent
hoverEnabled: true
propagateComposedEvents: true
onClicked: {
aboutMenu.close()
aboutMenuItem.action.trigger()
}
onEntered: {
parent.color = "#454B57"
}

onExited: {
parent.color = Qt.rgba(0,0,0,0)
}
}

}

}
background: Rectangle {
implicitWidth: 150
implicitHeight: 40
color: "#1F2025"
}
}
//关于
Rectangle{
id:about
anchors.top: parent.top
anchors.bottom: parent.bottom
anchors.left:setting.right
color: Qt.rgba(0,0,0,0)
width: 100

Row{
anchors.centerIn: parent
spacing: 2
Text {
color: "#FFFFFF"
font.pixelSize: 20
text: qsTr("关于")
verticalAlignment: Text.AlignVCenter
anchors.verticalCenter: parent.verticalCenter
}
Image {
width: 32
height: 32
anchors.verticalCenter: parent.verticalCenter
source: "qrc:/image/icon/down.png"
}
}
MouseArea{
anchors.fill: parent
hoverEnabled: true
propagateComposedEvents: true
onClicked: {
aboutMenu.open()
}
onEntered: {
parent.color = "#454B57"
}

onExited: {
parent.color = Qt.rgba(0,0,0,0)
}
}

}
}

QML中渲染视频

一 ,需求

在qml的Rectangle中渲染视频。

二,实现

  • 继承QQuickPaintedItem 在paint函数中,绘制QImage
#ifndef MyCamera_H
#define MyCamera_H

#include <QQuickPaintedItem>
#include <QImage>
#include <atomic>
class MyCamera : public QQuickPaintedItem
{
    Q_OBJECT
public:
    explicit MyCamera(QQuickItem *parent = nullptr);
    ~MyCamera();

    //开始预览
    Q_INVOKABLE void startPreview();
    //停止预览
    Q_INVOKABLE void stopPreview();
public slots:
    void newData();
signals:
    //通过信号和槽 通知更新数据
    void sinewData();
private:
    std::atomic<bool> isRuning{false};
    cv::Mat curMat;
protected:
    //将curMat绘制到界面上
    void paint(QPainter *painter);
};

#endif // MyCamera_H
#include MyCamera.h
#include <QVector3D>
#include <QPainter>
#include <QtConcurrent>
#include <chrono>
#include <thread>
#include <opencv.hpp>
#include <opencv2/imgproc.hpp>

MyCamera::MyCamera(QQuickItem *parent) : QQuickPaintedItem(parent)
{ connect(this,&MyCamera::sinewData,this,&MyCamera::newData,Qt::QueuedConnection);
}

MyCamera::~MyCamera()
{
    stopPreview();
}

void MyCamera::startPreview()
{
  //此处可打开相机,从相机    
   isRuning=true;
    QtConcurrent::run([&](){
        //相机循环取图
        while(isRuning){
            cv::Mat mat;
            if(camera->grabImage(mat)){
                //降采样
                cv::resize(mat,curMat,cv::Size(mat.cols/8,mat.rows/8),0,0,cv::INTER_NEAREST);
            }
        }
    });
}

void MyCamera::stopPreview()
{
    isRuning=false;
}
void MyCamera::newData(){
    update();
}

void MyCamera::paint(QPainter *painter)
{
    QImage img((const uchar*)(curMat.data),curMat.cols,curMat.rows,curMat.step,   QImage::Format_Grayscale8);
    painter->drawImage(this->boundingRect(),img);
 }
  • main.cpp中注册上述类型
qmlRegisterType<MyCamera>(MyCamera,1,0,MyCamera);
  • qml使用此类型
import MyCamera 1.0
Rectangle{
    id:root
    //视频
    MyCamera{
        id:mycamera
        anchors.fill: parent
        visible: true
        Component.onCompleted: {
            mycamera.startPreview()
        }
}

三,注意事项

利用单独的一个线程去解析相机或者视频流的图像,并通过信号和槽机制去通知更新